Sunday, February 26, 2017

Simple Tilemap Unity3d

SimpleTilemap v1.0

Import Settings Import Settings
Developed for @isotacticsgame
SimpleTilemap is a totally free library for generating tilemaps in Unity at runtime. It provides users with a single script that, when used with a tilemap sprite, will generate a custom textured mesh with tilemap-indexed tiles, using a single GameObject. Its intended use is for 2D pixelart games with orthographic cameras, and has not been tested or verified with 3D assets.

Usage

All functionality is contained in the single SimpleTilemap script, with an example of full functionality in the two included example Unity scenes and in the APIDemo.cs script. The biggest thing to note with this library is that this script assumes certain import settings on tilemap sprties to work properly, which you can see below.
Import Settings
The big thing to note is that this script assumes that the texture is set to Sprite with a one pixel per unit PPU setting, Point filter mode, and no compression. "Sprite Mode" is also set to "Single", even for tilemaps. I recgonize this is somewhat of a limitation, but I also know this is somewhat standard practice for pixelart games in Unity. If anybody has any ideas/opinions around this, please let me know!
This is also why you need to fill in the tilemap parameters on the script. For more info on the component, see below.

Component parameters

Component Parameters
The component is relatively barebones, but displays core parameters to get the script working. In order:
Map Render Type allows you to choose between a Standard Grid map and an Isometric map. The main difference here is that Isometric maps are rendered in a slightly different way than standard maps, which is reflected in the appearance of the "Tile Art Height Fraction" and "Tile Pivot Y" parameters when Isometric is selected.
Map Size allows you to select how wide/tall you map is. Worth noting is that in standard maps, (0,0) is the bottom left corner, and in Isometric maps it is the leftmost corner. The max map size is currently limited to 100 only because that runs up againsts Unity's max vert number for a single mesh. I have ideas about how to make bigger maps, but I'll wait and see if it is a thing people are interested in.
Tile Width/Height is the width/height of a single tile in the tilemap, in Unity units. Note that this isn't how tall the art is in a given tile, but the actual tile dimensions. This should normally be your PPU import setting dimension in pixels of your tile, but changing these values while maintaining the same ratio between them will result in a small or large *rendered tilemap.
Tile Art Height Fraction is only relevant for Isometric maps and determines how to properly draw the map by defining what fraction of your total tile height your tile art occupies. A value of '2' would indicate that the tile base of your art is 1/2 the total height of your tile.
Tile Pivot Y determines where the leftmost point on a given tile in your isometric tilemap is in Y (X is assumed to be 0). This assumes that a given tile's (0,0) is in the bottom left corner, so this should be a positive value, with a maximum at your Tile Height.
Render Spacing controls how much space there is in Z between tiles on different "layers". This setting defaults to 1 and should be fine for most games. This is how the library sorts depth.
Tilemap Material this is the default material used to render the tilemap. It shouldn't be changed, but in actuality is just the Unity default Unlit/Transparent Cutout shader.
Tilemap is your actual tilemap sprite.
Tile Columns/Rows is how many columns/rows are in your provided tilemap.

Where to go from here

I'd love to hear feedback (issues/pull requests/DMs/etc.) on this library! I can be reached on Twitter through @kkukshtel or through my game @isotacticsgame). The intention is to keep the library as barebones as possible, so if you can think of features almost everyone would want, let me know, or submit a pull request.

License

Do whatever.

Voozix 2D game made using Unity

Voozix

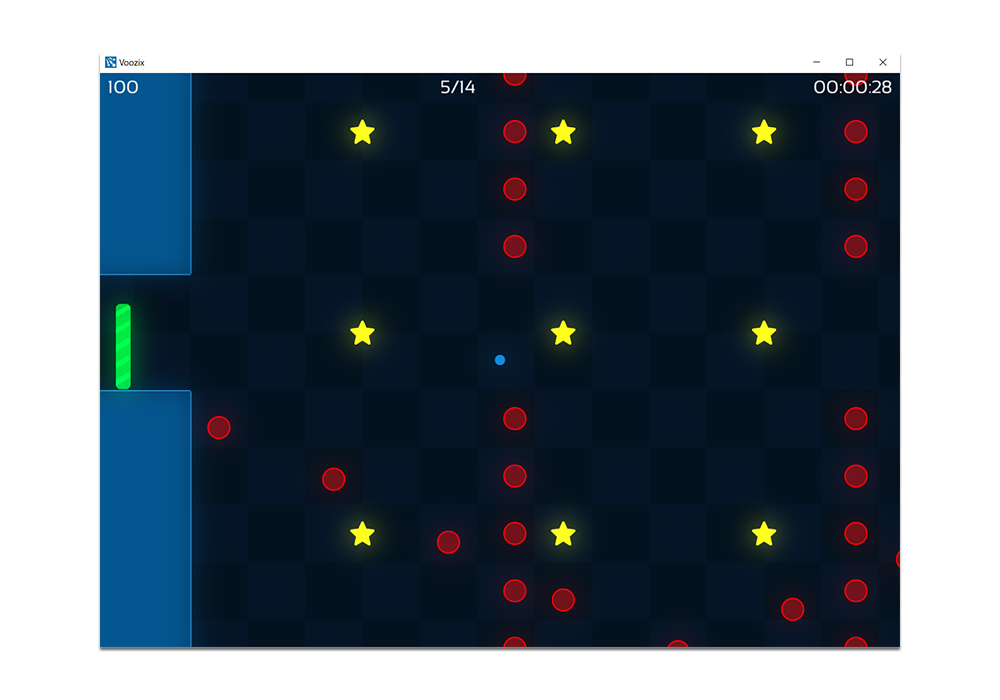
Voozix is a 2D game made using Unity. The basic premise revolves around a player controlling a ball and collect stars in order to gain points. However, the more stars the player collects, the harder the game gets by spawning more enemies. Additional game modes and challenges are available as well.
The main development goal is to have a playground to lean more about shader effects and animations. Instead of implementing various effects on standalone applications, I decided implement them as part of a game.

Documentation

Unity Size Explorer

Build status
Unity Size Explorer example

Quick Start

Just want to run the tool using a pre-compiled binary?
Download Unity Size Explorer

Background

While developing Tumblestone for mobile devices I needed to greatly reduce the amount of disk space the game required. For iOS in particular games must be at or below 100 mb. Players must be on wifi in order to download games above 100 mb -- initially, Tumblestone was over 1 gb! I developed this tool to help reduce Tumblestone from 1 gb to 100 mb.
Normally, you can view Unity Editor's log after building to see some stats on a game's file size. This is what it looks like:
Textures      33.1 mb     54.1% 
Meshes        0.0 kb     0.0% 
Animations    0.0 kb     0.0% 
Sounds        8.3 mb     13.6% 
Shaders       172.8 kb     0.3% 
Other Assets  8.2 mb     13.4% 
Levels        82.1 kb     0.1% 
Scripts       4.7 mb     7.7% 
Included DLLs 6.4 mb     10.5% 
File headers  201.5 kb     0.3% 
Complete size 61.3 mb     100.0% 

Used Assets and files from the Resources folder, sorted by uncompressed size:
 2.1 mb     3.4% Assets/Spritesheets/v2/Spritesheet1.png
 2.1 mb     3.4% Assets/Spritesheets/v2/Spritesheet2.png
 2.0 mb     3.3% Assets/Spritesheets/v2/Spritesheet3.png
 2.0 mb     3.3% Assets/Spritesheets/v2/Spritesheet4.png
 // list continues for every file included in the game
This is quite helpful. It tells you how big your game is and breaks things down by high level categories. You can even look through the list of assets that follows to find the worst offendors. When first starting to optimize file size this is sufficient as oftentimes the largest files (listed at the top) can be optimized yielding big improvements.
Howvever in the quest to fit under 100 mb I reached a point where the list of files was no longer very useful. That's because there was no longer one or two big files to optimize. Everything non-essential was already quite small, and if I wanted to carve off another 10 or 15 mb I needed to strike at whole folders or class of files. Unity's log file, which lists every file sorted by size, makes it very hard to see the bigger picture.
Further aggravating things is the fact that Unity only generates the above after building. In my case building for iOS often took 5 to 10 minutes. This meant that my workflow was drawn out as I made a change, built, then compared the old and new log files. Sometimes the results worked as expected and I could continue. Other times the changes had a smaller impact and were discarded. I needed a way to more quickly and accurately gauge what impact an optimization would have without having to spend 10 minutes per an iteration.
That's where this tool comes in. It reads the log file and generates a tree view and pie chart. The tree view lists every file grouped by folder -- just like in the file system. You can expand or collapse folders to view sub-folders and files. You can check on or off a given file or folder, excluding the corresponding size from the projected game file size. Plus there's a nice pie chart visually showing how much space everything uses relative to the rest of the project.

Questions, Bug Reports or Feature Requests?

Do you have feature requests, questions or would you like to report a bug? Please post them on the issue list.

Contributing

As this projected is maintained by one person, I cannot fix every bug or implement every feature on my own. So contributions are really appreciated!
A good way to get started:
  1. Fork the Unity Size Explorer repo.
  2. Create a new branch in you current repo from the 'master' branch.
  3. 'Check out' the code with Git or GitHub Desktop
  4. Push commits and create a Pull Request (PR)

License

Unity Size Explorer is open source software, licensed under the terms of MIT license. See License.txt for details.

How to Build

Unity Size Explorer is a WPF program written for Windows. It requires .NET 4.5.2. Use Visual Studio and open solution file under Source. You may need to restore Nuget packages on first run.

How to Run

  1. Double-click UnitySizeExplorer.exe
  2. Go to File > Open
  3. Navigate to Unity Editor's log file. (Typically under $HOME\AppData\Local\Unity\Editor)
  4. Check or uncheck items in the tree view to add/remove them from the pie chart and estimated file size. Expand folders to work with their children directly.
  5. It helps if you first filter out very small files as they clutter the UI and can make the tool sluggish. Go to Filter > Small. These items will still be counted in the final size, but will be hidden from the tree view and pie chart.
  6. Note that you must clear the contents of the log file before building in Unity to ensure that there is only one size entry.

Unity3d Yarn Spinner


Yarn Spinner

Yarn Spinner logo
Yarn Spinner is an interpreter for the Yarn language, written in C#.
Yarn is a language that's designed to make it super easy to create interactive dialogue for games. Yarn's very similar in style to Twine, so if you already know that, you'll be right at home! If you don't, that's cool - Yarn's syntax is extremely minimal, and there's not much there to learn. The Yarn language is used in a number of cool games, including Night In The Woods and Knights and Bikes.
Important: Yarn Spinner is still under development, and we haven't made our 1.0 release yet. It's probably fine to use right now, but there are a few bits and pieces that might change between now and first release.
Build Status

(Image from "Night in the Woods" by Scott Benson, Bethany Hockenberry and Alec Holowka. Used with permission.)
Yarn Spinner is designed to be easy to add to Unity games, but it's also intended for use in other contexts as well.

Quick Start

  1. Download the Yarn editor, so that you can create and edit Yarn files.
  2. Create a new project in Unity.
  3. Download the latest release's Unity package.
  4. Import the package.
  5. Go to the Yarn Spinner/Examples/ folder in Unity, and open one of the demo scenes.
  6. Run the game, and poke around!

What To Do Next

License

Yarn Spinner is available under the MIT License. This means that you can use it in any commercial or noncommercial project. The only requirement is that you need to include attribution in your game's docs. A credit would be very, very nice, too, but isn't required.

Made by Secret Lab!

Yarn Spinner was originally created by Secret Lab, an Australian game dev studio! Come say hi! You can visit the Yarn Spinner page on the Secret Lab website for a little more info, and to donate to Yarn Spinner open source development at Secret Lab.
The awesome logo was made by the excellent Rex Smeal, and is under the Creative Commons Attribution-ShareAlike 4.0 International License.

Help Us Make Yarn Spinner!

Yarn Spinner needs your help to be as awesome as it can be! You don't have to be a coder to help out - we'd love to have your help in improving our documentation, in spreading the word, and in finding bugs.
  • Our issues page contains a list of things we'd love your help in improving.
  • Hop into our IRC channel, which is #yarnspinner on Freenode, to chat to the team, lend a hand, or ask questions.
If you want to contribute to Yarn Spinner (!!), go read our contributor's guide!